How to Easily Set Up Contentlayer with Next.js 13
My portfolio website has undergone a massive overhaul using Next.js 13 and utilizing the App Router. I also used Contentlayer for MDX blog posts to ensure that my content is optimised for both search engines and readers. I wanted to create a step-by-step guide on how to integrate Contentlayer into your Next.js application.
What is Contentlayer?
Before we dive in, let's briefly discuss what Contentlayer is. Contentlayer is a powerful tool that allows you to manage your content in a structured and efficient manner. It's a static content generator for React that works seamlessly with Next.js, making it a fantastic choice for developers looking to streamline their content management process.
Let's see how we can set up Contentlayer with Next.js 13.
Initiating Your Next.js Project
We start by initialising our Next.js 13 project. Create a new project using this command:
npx create-next-app@latest
# or
yarn create next-app
# or
pnpm create next-app
You will see some questions that allow you to modify the configuration settings of your app. These questions relate to adding TypeScript, ESLint, Tailwind, App Router, and so on. These options don't change much about the way we implement Contentlayer but here are the options I used:
- Would you like to add TypeScript with this project? Y
- Would you like to use ESLint with this project? Y
- Would you like to use Tailwind CSS with this project? Y
- Would you like to use the
src/ directorywith this project? N - Use App Router (recommended)? Yes
- Would you like to customize the default import alias? N
From here onwards, we will use npm but the commands will be very similar across pnpm and yarn.
This command will generate a new Next.js application for you. To ensure everything is functioning as intended, navigate to your project's directory with cd project-name and launch your application by running npm run dev from the terminal. You should see your application up and running at http://localhost:3000.
Hot Tip: With pnpm and yarn, you can omit
runand just typepnpm/yarn devand it will do the same thing aspnpm/yarn run dev
Adding Contentlayer
Next, we need to add Contentlayer and the Next.js plugin to our project. Install it with the following command:
npm install contentlayer next-contentlayerWe need to install the Next.js plugin because Contentlayer works for many different frameworks, we need to install the additonal packge so Contentlayer can hook into the Next.js processes.
Next.js Configuration
Inside of the next.config.js file, add the following code:
const { withContentlayer } = require('next-contentlayer')

/** @type {import('next').NextConfig} */
const nextConfig = {
  reactStrictMode: true,
  swcMinify: true,
}

module.exports = withContentlayer(nextConfig)
The withContentlayer function is used to integrate Contentlayer with Next.js's live-reload and build process. It is necessary to wrap the nextConfig in the withContentlayer function because Contentlayer generates data in the .contentlayer directory at the project root by looking for files that match the specified pattern. The generated data is then used by the Next.js application to render pages. This improves the overall Developer Experience, as edited Markdown / MDX files can utilise hot reloading.
Ignore Build Output
Add the .contentlayer directory into your .gitignore file to ensure each build of your app will have the latest generated data and you do not run into issues with Git.
TSConfig Options
If you setup your Next.js app with TypeScript, add the following options to your tsconfig.json.
{
  "compilerOptions": {
    "baseUrl": ".",
    "paths": {
      "contentlayer/generated": ["./.contentlayer/generated"]
    }
  },
  "include": [
    "next-env.d.ts",
    "**/*.ts",
    "**/*.tsx",
    ".next/types/**/*.ts",
    ".contentlayer/generated"
  ]
}
Create Post Document Type
Create a contentlayer.config.js file in the project's root. This defines the structure of your content. Here is the configuration I use:
import { defineDocumentType, makeSource } from 'contentlayer/source-files'

export const Post = defineDocumentType(() => ({
  name: 'Post',
  filePathPattern: '**/*.mdx',
  contentType: 'mdx',
  fields: {
    title: { type: 'string', required: true },
    date: { type: 'date', required: true },
    description: { type: 'string', required: true },
  },
  computedFields: {
    url: {
      type: 'string',
      resolve: (post) => `/blog/${post._raw.flattenedPath}`,
    },
  },
}))

export default makeSource({
  contentDirPath: 'posts',
  documentTypes: [Post],
})
This configuration tells Contentlayer that you have a 'Post' document type, located in the 'posts' directory, and each post includes 'title', 'date', and 'description' fields. The computed url field, as it sounds, generates a field based on the posts' filename (without the file extension)
Creating Posts
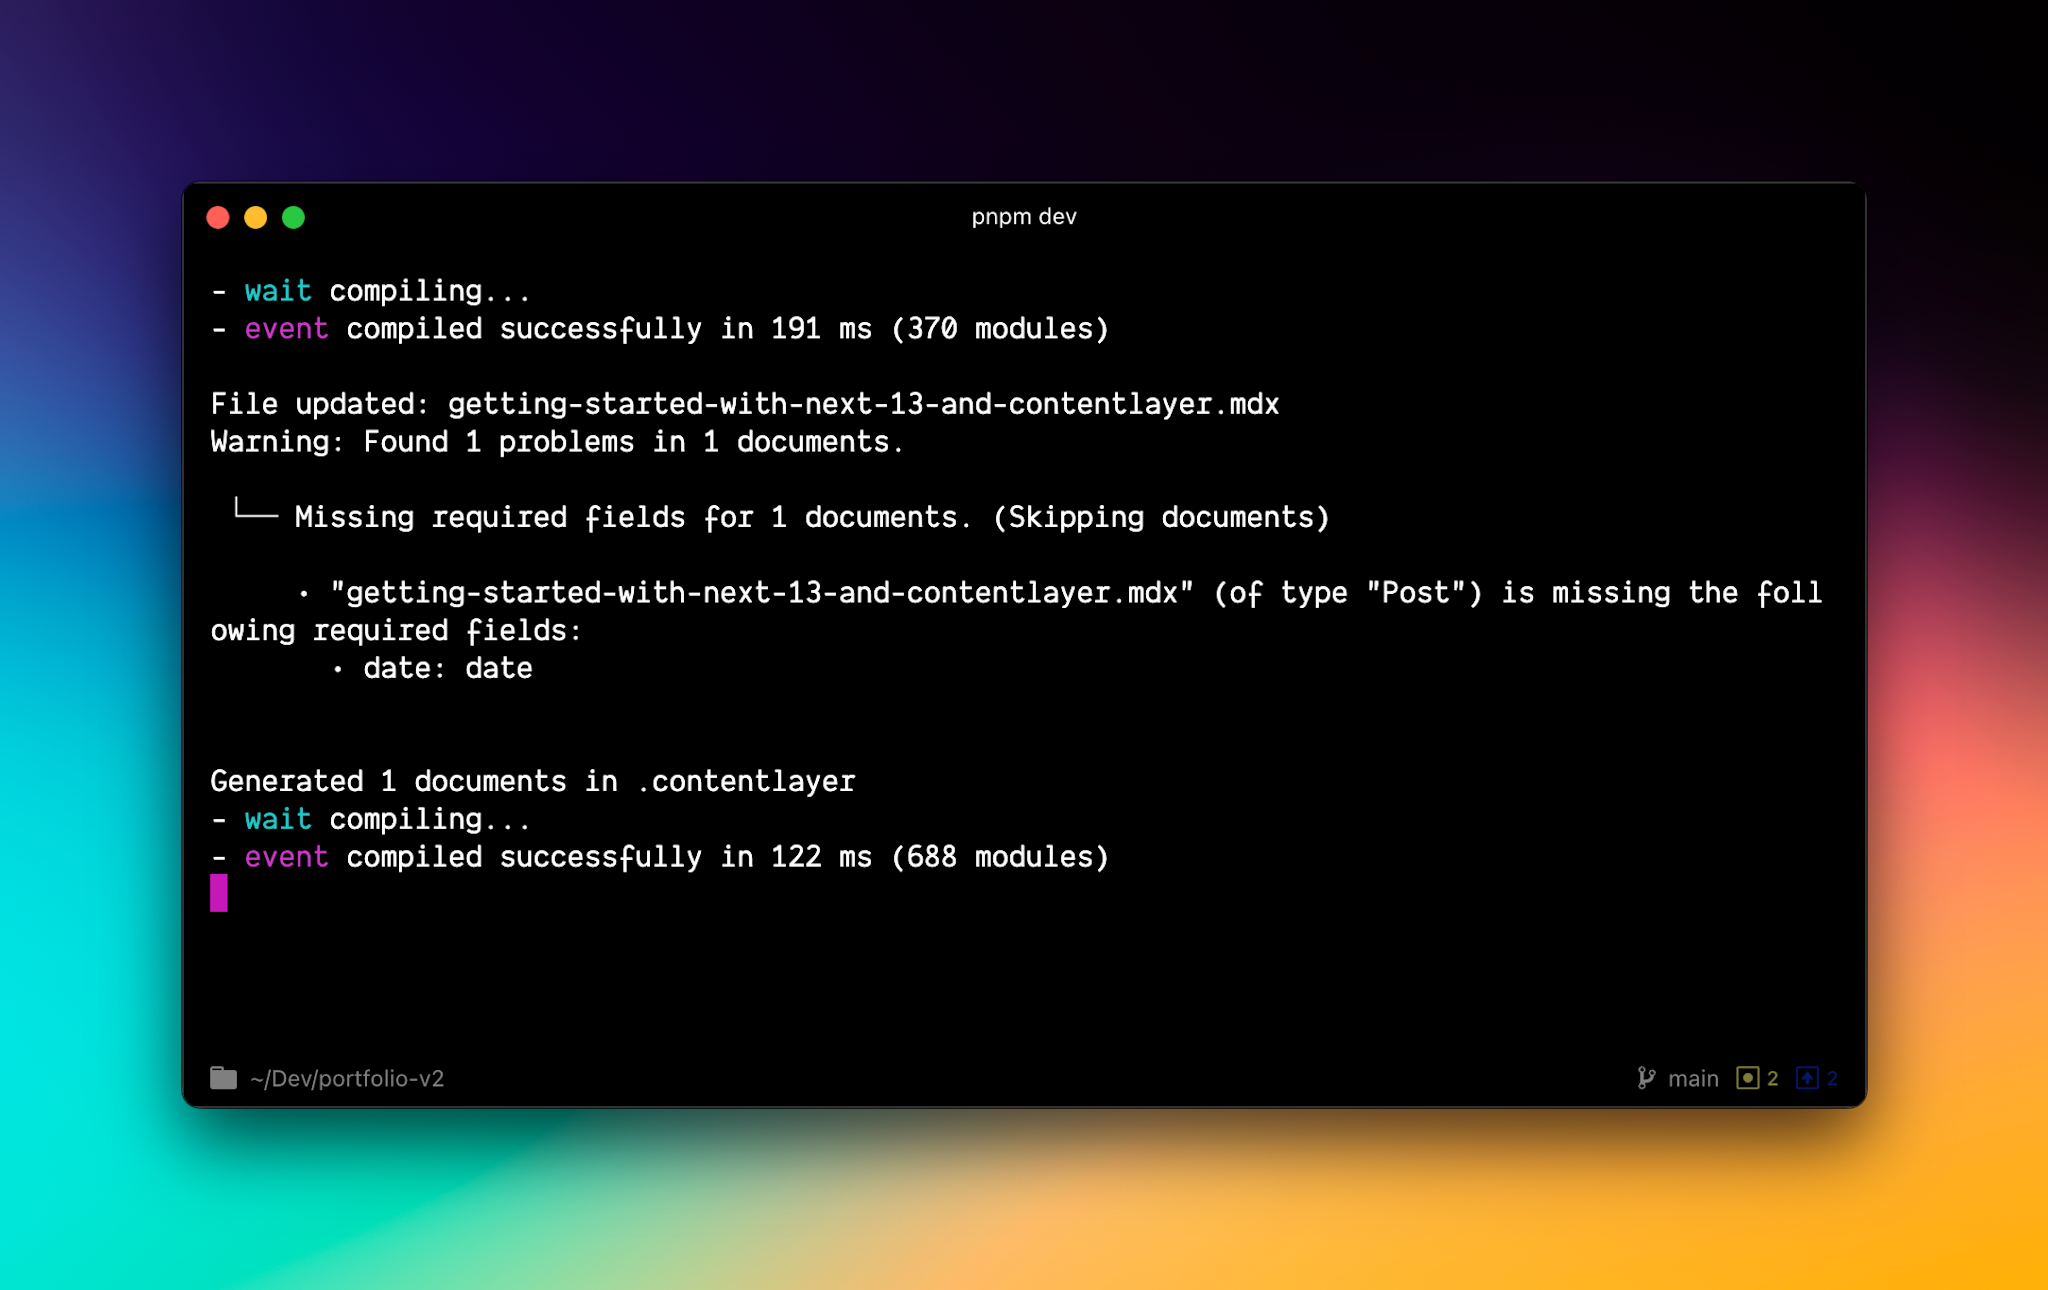
Now the fun part, create some posts! Make sure they are located under the posts directory, as specified in contentlayer.config.js. A cool feature of Contentlayer is it will tell you when you are missing required fields.
Adding Posts to Next.js Pages
Now that we have Contentlayer configured and some MDX posts created, we can focus on pulling the posts into our Next.js pages. The below code pulls the MDX posts onto the home page.
import Link from 'next/link'
import { allPosts } from 'contentlayer/generated'

export default function Home() {
  return (
    <div className="mx-auto max-w-xl py-8">
      <h1 className="mb-8 text-center text-2xl font-black">Posts</h1>
      {allPosts.map((post) => (
        <article key={post._id} className="mb-8">
          <h2 className="text-xl">
            <Link href={post.url} className="text-blue-700 hover:text-blue-900">
              {post.title}
            </Link>
          </h2>
          <time
            dateTime={post.date}
            className="mb-2 block text-xs text-gray-600"
          >
            {new Date(post.date).toLocaleDateString('en-US', {
              day: 'numeric',
              month: 'long',
              year: 'numeric',
            })}
          </time>
          <p className="relative z-10 mt-2 text-sm text-zinc-600 dark:text-zinc-400">
            {post.description}
          </p>
        </article>
      ))}
    </div>
  )
}
allPosts is an array of posts made available by Contentlayer
When looping over allPosts, the type of each post is inferred as Post and you get nice autocomplete suggestions based on the fields specified in the contentlayer.config.js file! If you prefer, you can import the Post type from contentlayer/generated to declare the type explicitly. (For TypeScript projects)
import { allPosts, type Post } from 'contentlayer/generated'

allPosts.map((post: Post) => ...)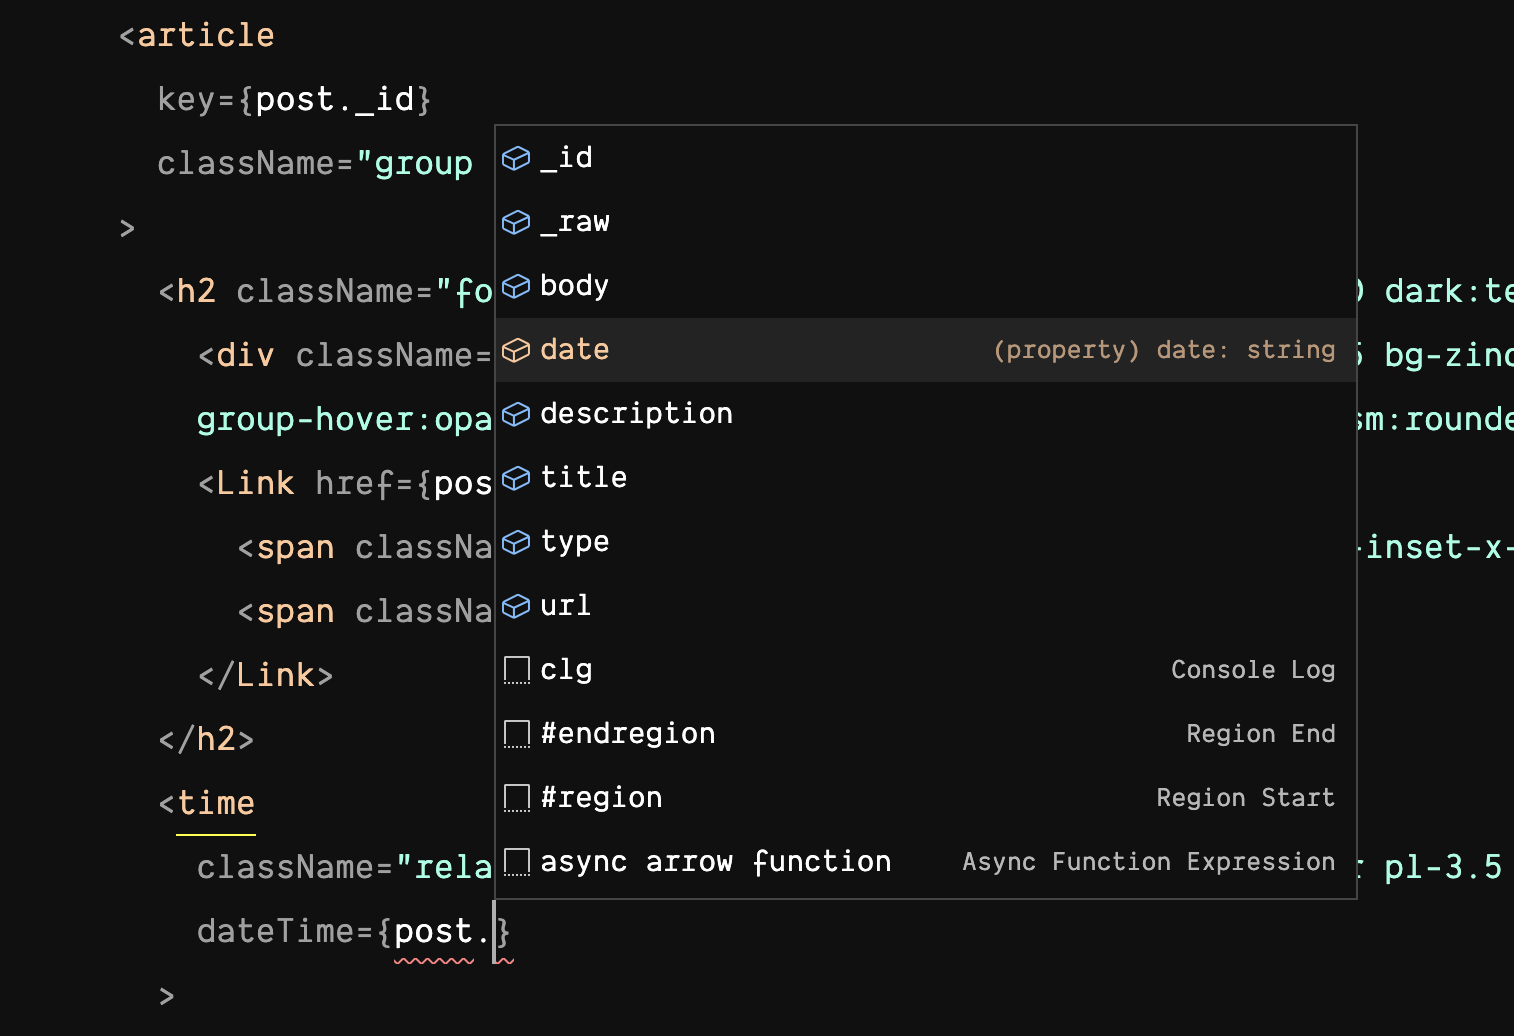
Now, when you visit http://localhost:3000, you should see a post feed on the home page.
Add Dynamic Post Page
Currently, when clicking on a post, we get a 404. Let's make a dynamic page in Next.js at app/blog/[slug]/page.tsx and use the code below.
import type { Metadata } from 'next'
import Image from 'next/image'
import { notFound } from 'next/navigation'
import { allPosts } from 'contentlayer/generated'
import { useMDXComponent } from 'next-contentlayer/hooks'

export const generateStaticParams = async () =>
  allPosts.map((post) => ({ slug: post._raw.flattenedPath }))

export const generateMetadata = ({
  params,
}: {
  params: { slug: string }
}): Promise<Metadata | undefined> => {
  const post = allPosts.find((post) => post._raw.flattenedPath === params.slug)

  if (!post) return

  return {
    title: post.title,
    description: post.description,
  }
}

export default function Post({ params }: { params: { slug: string } }) {
  const post = allPosts.find((post) => post._raw.flattenedPath === params.slug)

  if (!post) notFound()

  const MDXContent = useMDXComponent(post.body.code)
  return (
    <article className="mx-auto max-w-xl py-8">
      <div className="mb-8 text-center">
        <time dateTime={post.date} className="mb-1 text-xs text-gray-600">
          {new Date(post.date).toLocaleDateString('en-US', {
            day: 'numeric',
            month: 'long',
            year: 'numeric',
          })}
        </time>
        <h1 className="text-3xl font-bold">{post.title}</h1>
      </div>
      <div className="prose mt-8 dark:prose-invert prose-headings:font-display prose-a:text-cyan-500 prose-img:rounded-2xl">
        <MDXContent components={{ Image }} />
      </div>
    </article>
  )
}
Hot Tip: If an
ifstatement only has one line, you can omit the curly brackets.
Congratulations! You now have a basic blog starter with Next.js and Contentlayer. This is only the starting point. You can explore and incorporate all the necessary features of Contentlayer. Their documentation is a great place to learn.